OPNsense Installation

After booting, log in using
User: installer
Password opnsense

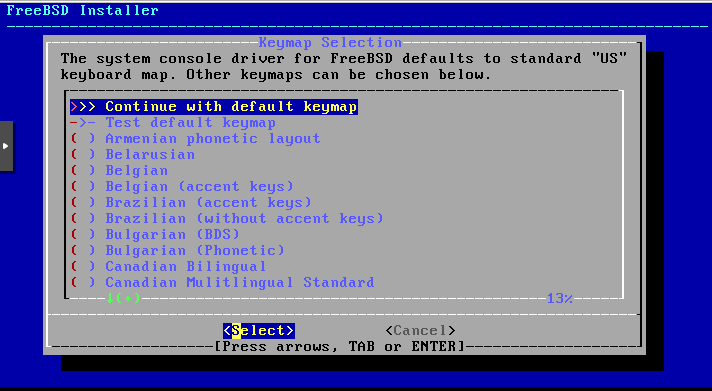
Then proceed using the default keymap.

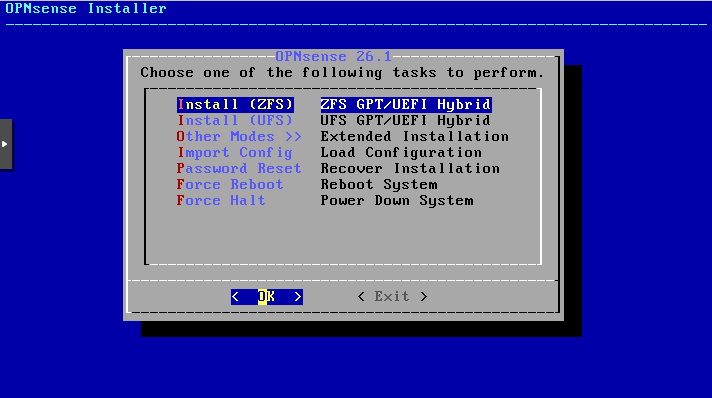
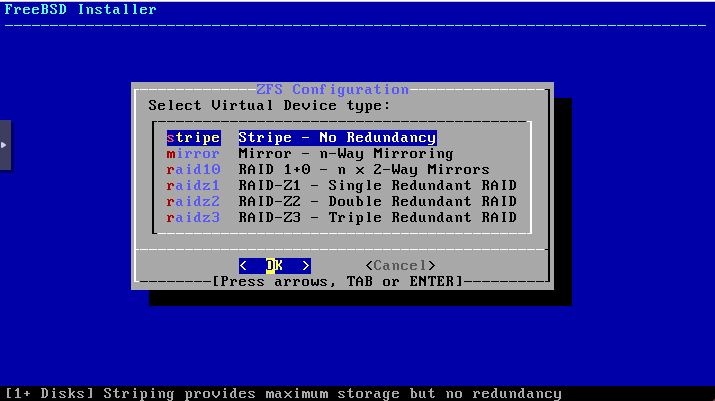
Choose „Install ZFS“ (this allows you to create snapshots later).

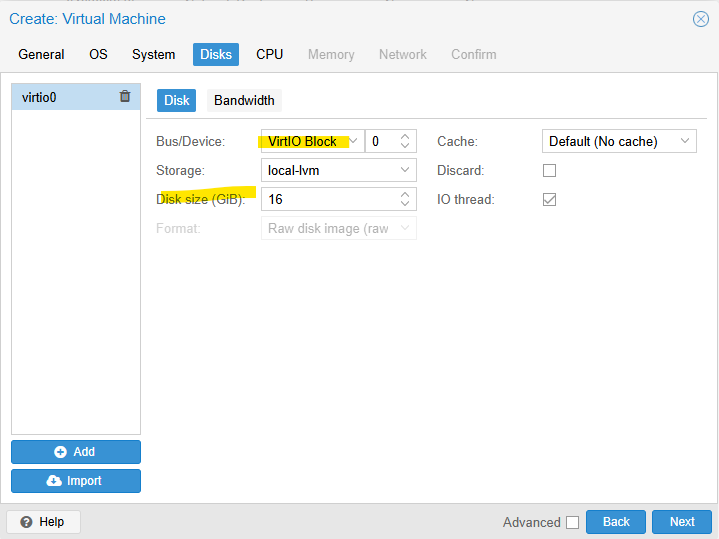
Select your virtual disk as the target for the installation.

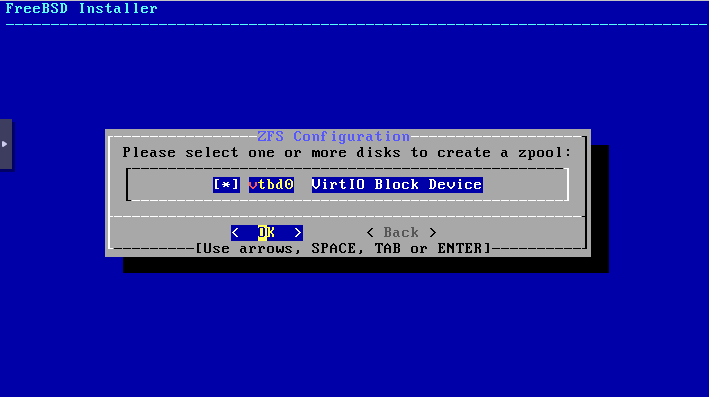
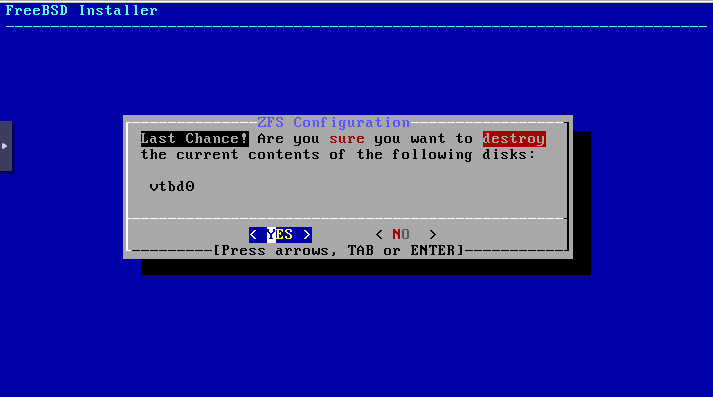
Confirm that the data on the disk may be erased once you have verified that it is the correct virtual disk and that deleting the data is acceptable.

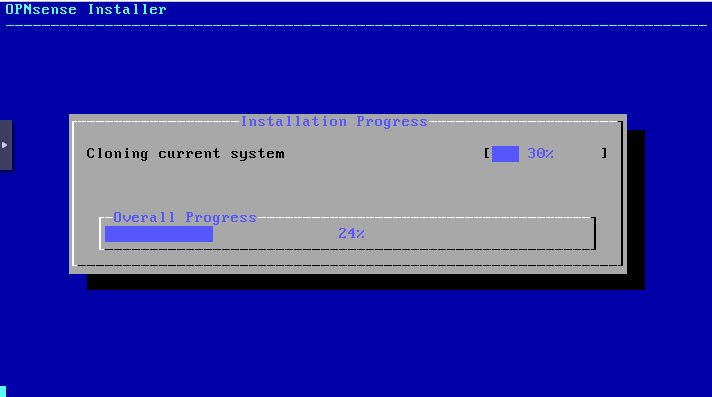
The installation has started and is now in progress.

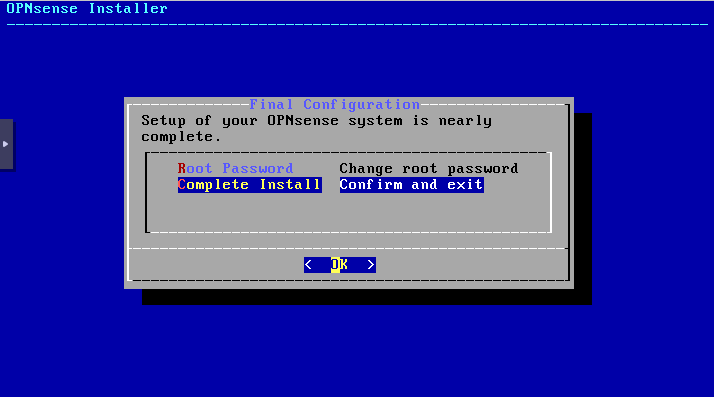
Click Complete Install. The password can be changed later in the GUI.

Now perform a restart to complete the installation.

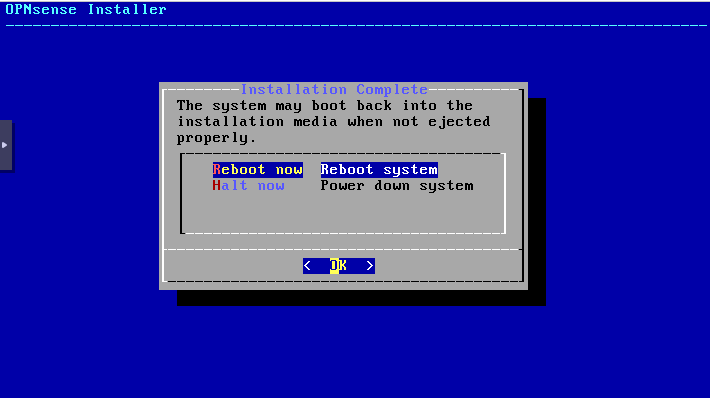
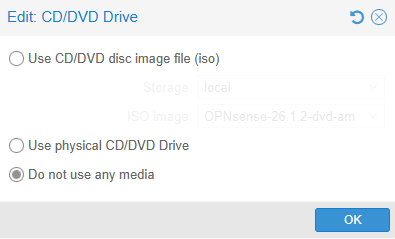
Afterwards, you can remove the ISO:

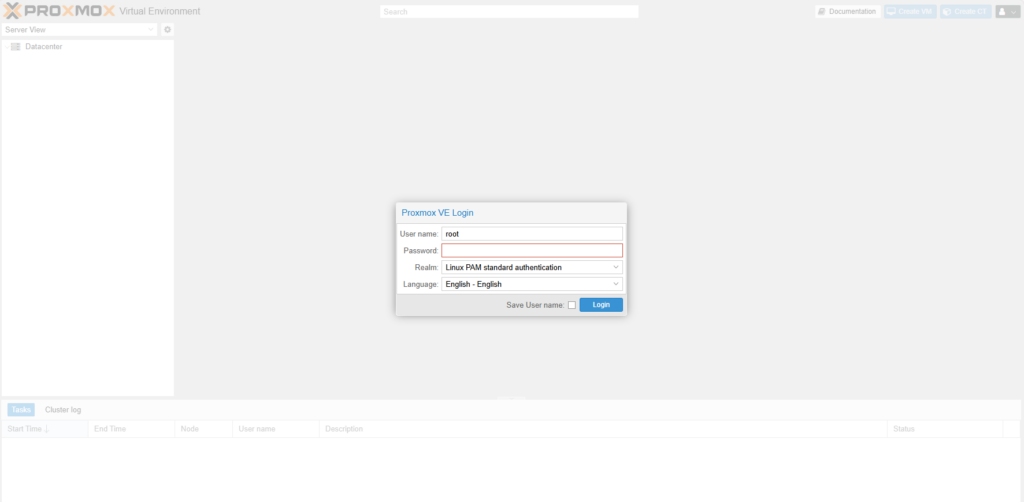
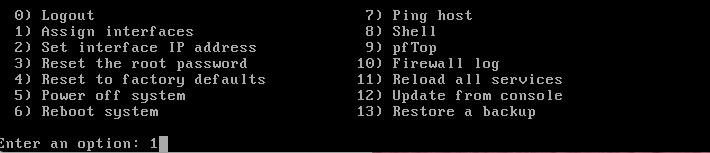
Open the VM console in Proxmox and log in to OPNsense after the reboot.

User: root
Password: opnsense

Then select option 1 – Assign interfaces.

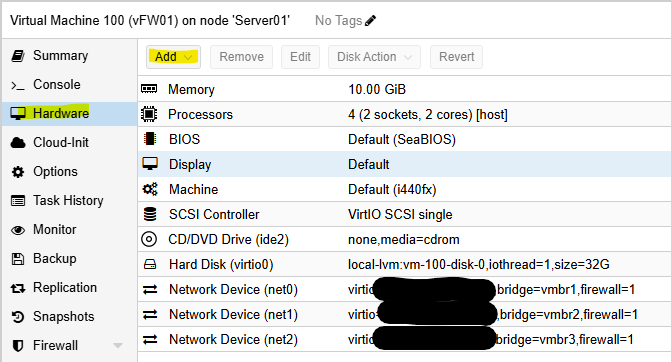
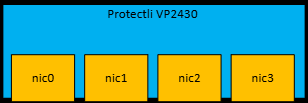
Now the assignment will be applied. If in doubt, double-check your MAC address against the one in the VM configuration. You can see the names of the interfaces and NICs in the field above in your console.”

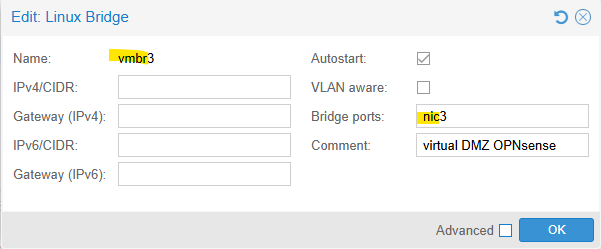
Let’s skip the DMZ for now

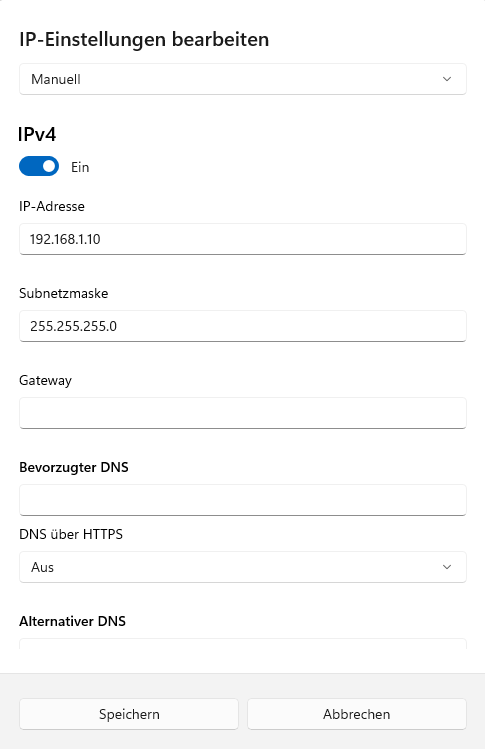
Connect your client directly to LAN3 (NIC2) using a network cable and assign it the IP address 192.168.1.10 with subnet mask 255.255.255.0. You can leave the gateway and DNS fields empty. Once the configuration is complete (e.g., DHCP server configured), you can switch your device back to DHCP. Below is an example of the network settings for Windows:

You should now be able to log in to the OPNsense web interface using your browser at https://192.168.1.1

Use the following credentials:

Username: root
Password: opnsense

Once logged in, you will have access to the full GUI to continue configuration and management of your OPNsense firewall.”

Creating an OPNsense VM in Proxmox

Download the DVD ISO image from the OPNsense website: Download – OPNsense (external Link)

choose the DVD type:

In Proxmox, upload the ISO to Datacenter → local → ISO Images

Once the upload is complete, we can create the VM. To do this, click ‚Create VM‘ in the top-right corner.

Add a name for example, vFW01 or FW02, …

Select the OPNsense ISO image and set the Guest OS type to ‚Other‘, then click ‚Next‘

Next

Set up your virtual disk as a VirtIO block with at least 8 GB.

CPU config Type „host“

Set up your memory with at least 1024 MB.

Now add LAN2 (NIC1) as your network interface for the WAN.

Confirm and finish, but do not start the VM yet

Return to the VM, navigate to Hardware → Add → Network Device, and add LAN3 (NIC2) for the LAN interface and optional the LAN4 (NIC3) for the DMZ interface

In the VM options, enable autostart

Now Start the VM and open the console

Next Step: OPNsense Installation

Proxmox OPNsense config

This guide explains how to preconfigure Proxmox VE to run an OPNsense firewall as a virtual machine. Proper preparation of the Proxmox host is essential to ensure secure network segmentation, reliable performance, and a smooth OPNsense installation.

You will learn how to set up network bridges, assign physical interfaces, and apply best‑practice settings that allow OPNsense to operate as a fully functional virtual firewall. The focus is on creating a clean and flexible foundation that can be adapted to both lab environments and production use.

By completing these preconfiguration steps, Proxmox will be ready to host OPNsense efficiently, giving you full control over routing, firewalling, and network security within your virtualized infrastructure.

Now let’s finish setting up Proxmox.

First, we need to assign the physical network interfaces to OPNsense:

  • 1× WAN port
  • 1× LAN port with VLANs
  • 1× DMZ port (optional, if you plan to use a DMZ)
LAN2 (nic1) → OPNsense WAN → directly connected to your existing router

LAN3 (nic2) → LAN with VLANs → connected to your VLAN-capable switch

LAN4 (nic3) → DMZ → for example, directly connected to your NAS or other Switch (optional)Code-Sprache: JavaScript (javascript)

Creating the bridges in Proxmox

Go to System → Network and click Create → Linux Bridge.

You only need to create bridges for the three required interfaces:

  • WAN
  • LAN
  • DMZ (optional)

Start with:

WAN:

LAN (with multiple VLANs for network segmentation):

Example VLAN IDs: 200, 300, 400, 500 — each VLAN represents a separate network with its own services.

DMZ (optional):

A DMZ (Demilitarized Zone) is a separate network segment used to host services that need to be accessible from outside the internal network, while keeping the internal LAN isolated and protected.

Then click Apply Configuration

The switch port connected to the OPNsense LAN interface requires the following VLAN configuration:

1U (untagged)
200T (tagged)
300T (tagged)
400T (tagged)

Next Step: Creating an OPNsense VM in Proxmox

Network preparations

Taking over the existing network only requires changing the router’s IP address, for example from 10.10.1.1 to 10.11.1.1.

Example IPs

Network Evolution: From Flat Network to Virtualized Firewall

The diagram illustrates the transformation of a network architecture across three stages: a basic network without a firewall, a setup with a physical OPNsense firewall, and finally a fully virtualized OPNsense firewall running on Proxmox.

1. Existing Network (Left)

On the left side, the network operates without a dedicated firewall. The internet connection is terminated directly at a router using the subnet 10.10.1.1/24. This router forwards traffic straight to a switch, which connects all internal devices.

In this setup, routing and basic protection are handled solely by the router. There is no network segmentation, no advanced firewalling, and limited control over traffic flows between the internet and the internal network.


2. Network with Physical OPNsense Firewall (Middle)

In the middle scenario, a physical OPNsense firewall is introduced between the router and the internal network. The router now uses a separate network (10.11.1.0/24) and forwards traffic to the OPNsense firewall via 10.11.1.2 (WAN OPNsense Port).

The OPNsense firewall becomes the new gateway for the internal network (LAN) (10.10.1.1). All traffic between the internal switch and the internet must pass through OPNsense, enabling stateful firewalling, NAT, traffic inspection, and advanced security policies.

This design significantly improves security and control but requires dedicated hardware for the firewall.


3. Network with Virtualized OPNsense on Proxmox (Right)

On the right side, the physical firewall is replaced by a virtual OPNsense instance running on a Proxmox host. The router and WAN configuration remain the same, but OPNsense is now hosted as a virtual machine inside Proxmox (10.10.1.21).

Proxmox acts as the virtualization layer, connecting the WAN and LAN through virtual bridges. The OPNsense VM still serves as the default gateway (10.10.1.1) for the internal network, enforcing the same security policies as the physical firewall.

This approach combines the security benefits of OPNsense with the flexibility of virtualization, reducing hardware requirements while enabling easier backups, snapshots, and scalability.

Next step: Proxmox OPNsense config

Install Proxmox VE on the Protectli Appliance

for this demonstration, a Protectli VP2430 (4 × 2.5G ports) is used as the hardware platform.

While virtualized firewalls are not always the preferred approach in production environments, this guide addresses the common request to run OPNsense on top of Proxmox VE.

If you prefer to install OPNsense directly on the appliance instead of virtualizing it, you may skip the Proxmox steps below and create a bootable USB drive with the OPNsense image instead.

nic0 – LAN1: LAN Proxmox
nic1 – LAN2: WAN OPNsense
nic2 – LAN3: LAN OPNsense (VLAN Switch)
nic3 – LAN4: DMZ OPNsense

Requirements

  • A USB flash drive (8 GB or larger recommended)
  • Proxmox VE ISO image
  • A tool to create a bootable USB drive (e.g., balenaEtcher)
  • USB keyboard and mouse
  • Monitor
  • Network connection (LAN1 / nic0)

Download the Proxmox VE ISO installer from the official website (Download Proxmox software, datasheets, agreements) <- external LINK.

Step 1 – Create a Bootable USB Drive

  1. Download the latest Proxmox VE ISO.
  2. Use your preferred tool (e.g., balenaEtcher) to write the ISO image to a USB flash drive.
  3. Safely eject the USB drive once the process is complete.

Step 2 – Connect the Hardware

  1. Insert the bootable USB drive into the Protectli appliance.
  2. Connect a USB keyboard, USB mouse, and a monitor.
  3. Connect your network cable to LAN1 (nic0).

Step 3 – Boot from USB

  1. Power on the device.
  2. Enter the boot menu (commonly via F11, depending on BIOS).
  3. Select the USB device as the boot source.
  4. Choose “Install Proxmox VE (Graphical)” from the menu.

Step 4 – Installation Process

  1. Accept the EULA after reviewing it.
  2. Select the target disk for installation and click Next.
  3. Choose:
    • Country
    • Time zone
    • Keyboard layout
      Then click Next.
  4. Set a secure root password.
  5. Enter a valid email address for system notifications.
  6. Click Next.

Step 5 – Network Configuration

If LAN1 is connected to a network with an active DHCP server, an IP address may already be assigned automatically.

It is strongly recommended to:

  • Configure a hostname + static IP address
  • Ensure it is outside the DHCP range
  • Set the correct Gateway (GW)
  • Configure a DNS server

Since OPNsense will later handle DHCP services inside Proxmox, a static management IP ensures consistent access.

Click Next after entering the settings.


Step 6 – Final Review & Installation

  1. Review the summary.
  2. If everything is correct, click Install.
  3. Wait for the installation to complete.
  4. Reboot the system when prompted.

Accessing the Proxmox Web Interface + detach your USB Stick 😉

After reboot, access the Proxmox management interface via:

https://YOUR-IP-ADDRESS:8006Code-Sprache: PHP (php)

Login credentials:

  • Username: root
  • Password: The password defined during installation

Once the web interface is accessible via your browser, you can disconnect the keyboard, mouse, and monitor from the appliance. The system can then be managed entirely through the Proxmox web interface.

Next step: Network preparations