
for this demonstration, a Protectli VP2430 (4 × 2.5G ports) is used as the hardware platform.
While virtualized firewalls are not always the preferred approach in production environments, this guide addresses the common request to run OPNsense on top of Proxmox VE.
If you prefer to install OPNsense directly on the appliance instead of virtualizing it, you may skip the Proxmox steps below and create a bootable USB drive with the OPNsense image instead.
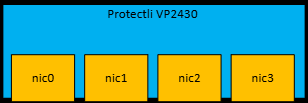
nic0 – LAN1: LAN Proxmox
nic1 – LAN2: WAN OPNsense
nic2 – LAN3: LAN OPNsense (VLAN Switch)
nic3 – LAN4: DMZ OPNsense
Requirements
- A USB flash drive (8 GB or larger recommended)
- Proxmox VE ISO image
- A tool to create a bootable USB drive (e.g., balenaEtcher)
- USB keyboard and mouse
- Monitor
- Network connection (LAN1 / nic0)
Download the Proxmox VE ISO installer from the official website (Download Proxmox software, datasheets, agreements) <- external LINK.
Step 1 – Create a Bootable USB Drive
- Download the latest Proxmox VE ISO.
- Use your preferred tool (e.g., balenaEtcher) to write the ISO image to a USB flash drive.
- Safely eject the USB drive once the process is complete.
Step 2 – Connect the Hardware
- Insert the bootable USB drive into the Protectli appliance.
- Connect a USB keyboard, USB mouse, and a monitor.
- Connect your network cable to LAN1 (nic0).
Step 3 – Boot from USB
- Power on the device.
- Enter the boot menu (commonly via F11, depending on BIOS).
- Select the USB device as the boot source.
- Choose “Install Proxmox VE (Graphical)” from the menu.
Step 4 – Installation Process
- Accept the EULA after reviewing it.
- Select the target disk for installation and click Next.
- Choose:
- Country
- Time zone
- Keyboard layout
Then click Next.
- Set a secure root password.
- Enter a valid email address for system notifications.
- Click Next.
Step 5 – Network Configuration
If LAN1 is connected to a network with an active DHCP server, an IP address may already be assigned automatically.
It is strongly recommended to:
- Configure a hostname + static IP address
- Ensure it is outside the DHCP range
- Set the correct Gateway (GW)
- Configure a DNS server
Since OPNsense will later handle DHCP services inside Proxmox, a static management IP ensures consistent access.
Click Next after entering the settings.
Step 6 – Final Review & Installation
- Review the summary.
- If everything is correct, click Install.
- Wait for the installation to complete.
- Reboot the system when prompted.
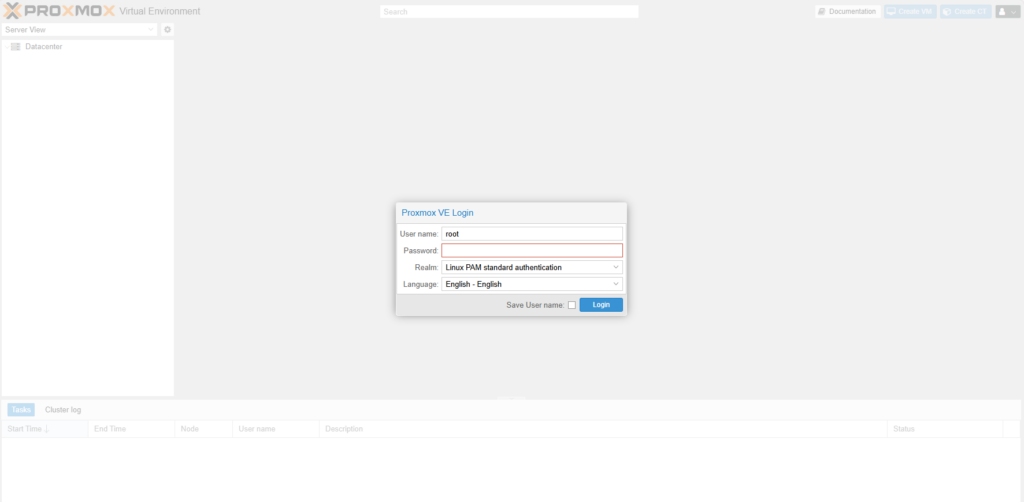
Accessing the Proxmox Web Interface + detach your USB Stick 😉
After reboot, access the Proxmox management interface via:
https://YOUR-IP-ADDRESS:8006Code-Sprache: PHP (php)Login credentials:
- Username: root
- Password: The password defined during installation
Once the web interface is accessible via your browser, you can disconnect the keyboard, mouse, and monitor from the appliance. The system can then be managed entirely through the Proxmox web interface.
If you don’t have a Proxmox subscription, update the repository configuration first. Then update the system to the latest version:
mv /etc/apt/sources.list.d/pve-enterprise.sources /root/ 2>/dev/null || true
mv /etc/apt/sources.list.d/pve-enterprise.list /root/ 2>/dev/null || true

cat > /etc/apt/sources.list.d/proxmox.sources <<'EOF'
Types: deb
URIs: http://download.proxmox.com/debian/pve
Suites: trixie
Components: pve-no-subscription
Signed-By: /usr/share/keyrings/proxmox-archive-keyring.gpg
EOF

mv /etc/apt/sources.list.d/ceph.sources /root/ 2>/dev/null || true
mv /etc/apt/sources.list.d/ceph.list /root/ 2>/dev/null || true

cat > /etc/apt/sources.list.d/ceph.sources <<'EOF'
Types: deb
URIs: http://download.proxmox.com/debian/ceph-squid
Suites: trixie
Components: no-subscription
Signed-By: /usr/share/keyrings/proxmox-archive-keyring.gpg
EOF

apt update
apt full-upgradeCode-Sprache: JavaScript (javascript)
Afterwards, a reboot may be required.
Note: Possible ASPM freezes on some Protectli models
On some Protectli models, Proxmox may experience random freezes or network-related stability issues caused by PCIe ASPM power management.
If you are affected, you can try disabling ASPM as a workaround.
Edit the GRUB configuration:
nano /etc/default/grubCode-Sprache: JavaScript (javascript)Find this line:
GRUB_CMDLINE_LINUX_DEFAULT="quiet"Code-Sprache: JavaScript (javascript)Change it to:
GRUB_CMDLINE_LINUX_DEFAULT="quiet pcie_aspm=off"Code-Sprache: JavaScript (javascript)If other parameters already exist, simply add pcie_aspm=off inside the quotes.
Then update GRUB and reboot:
update-grub
reboot
After the reboot, you can verify the setting with:
cat /proc/cmdlineThe output should include:
pcie_aspm=offNext step: Network preparations